Template

Monday, December 19, 2011

Neighbor Christmas Gifts...

Homemade Fajita Seasoning!


It all started about 9 months ago when my husband and I ran out of fajita seasoning while making fajitas for dinner. In a panic, my husband looked online to see if we could make it ourselves at home. We found a recipe and whipped up a batch and... it was delicious! We started putting this seasoning on everything we made that was even remotely Mexican. We vowed we would never buy seasoning again- and then I got to thinking...this would make a really unique neighbor gift for Christmas time. And not just neighbors, but it should be shared with everyone.

I bought the shaker bottles from IKEA for a $1 each and the seasoning from Costco. I made a huge batch of the seasoning, filled the bottles and because I was crunched for time (we just moved and are completely overwhelmed) I ordered some labels from VistaPrint for the bottles. (I would recommend making them, it would be much cheaper and more fun!)

Unfortunately, I found you can't put labels flat on a cone shaped bottle, so some tweaking was required by putting the label on card stock and then putting it on the bottle with poster tape, but the basic idea came out OK and I can't wait to share our seasoning with the neighborhood!


Packaged up and ready to be delivered!


Fajita Seasoning Mix Recipe
(original recipe by Linda Larsen, About.com Guide, modified to suit our tastes)

Ingredients:
3 Tbsp. cornstarch
2 Tbsp. chili powder
1 Tbsp. salt
1 Tbsp. paprika
1 Tbsp. sugar
1-1/2 tsp. onion powder
1/2 tsp. garlic powder
1/2 tsp cayenne pepper
1/2 tsp. cumin

Preparation:
Combine all of the ingredients in a small bowl. Pour into small glass or plastic container, seal tightly and store in a cool, dry place. Makes the equivalent of 3 packets of commercial or purchased Fajita Seasoning Mix.

Thursday, November 24, 2011

Delightful Quotes of the Day

Quote #1

Annalise:  Mommy, I think I want another baby in your tummy.

Me:  Maybe someday, but not for a little while. You know, you use to be in Mommy's tummy?

Annalise:  Yes and I want to go back in your tummy and play with some toys.

Quote #2

Annalise is sitting in her little red Cozy Coupe car.

Annalise (shouting):   Dada, I need some money!

Me:  What do you need money for?

Annalise:  I need some money for my car. DADA I NEED SOME MONEY...MONEY!

Me to Bryant:  I don't think this is the last time we will hear that.

Tuesday, November 1, 2011

Things I LOVE about Halloween!

Pumpkin Carving
I have loved carving pumpkins since I can remember, it is something I look forward to all year. But for someone who loves pumpkin carving so much, my pumpkin carving skills are sorely lacking. See that little pumpkin on the far left that looks like my 5 year nephew carved it? It's mine, and they have looked that way my whole life. My pumpkin carving skills stopped improving at about age 7 and some years I think they are even getting worse! This year after I was done I turned the pumpkin around to face my family and declared "Another Masterpiece" and everyone got a good laugh- so my creations still bring everyone joy!


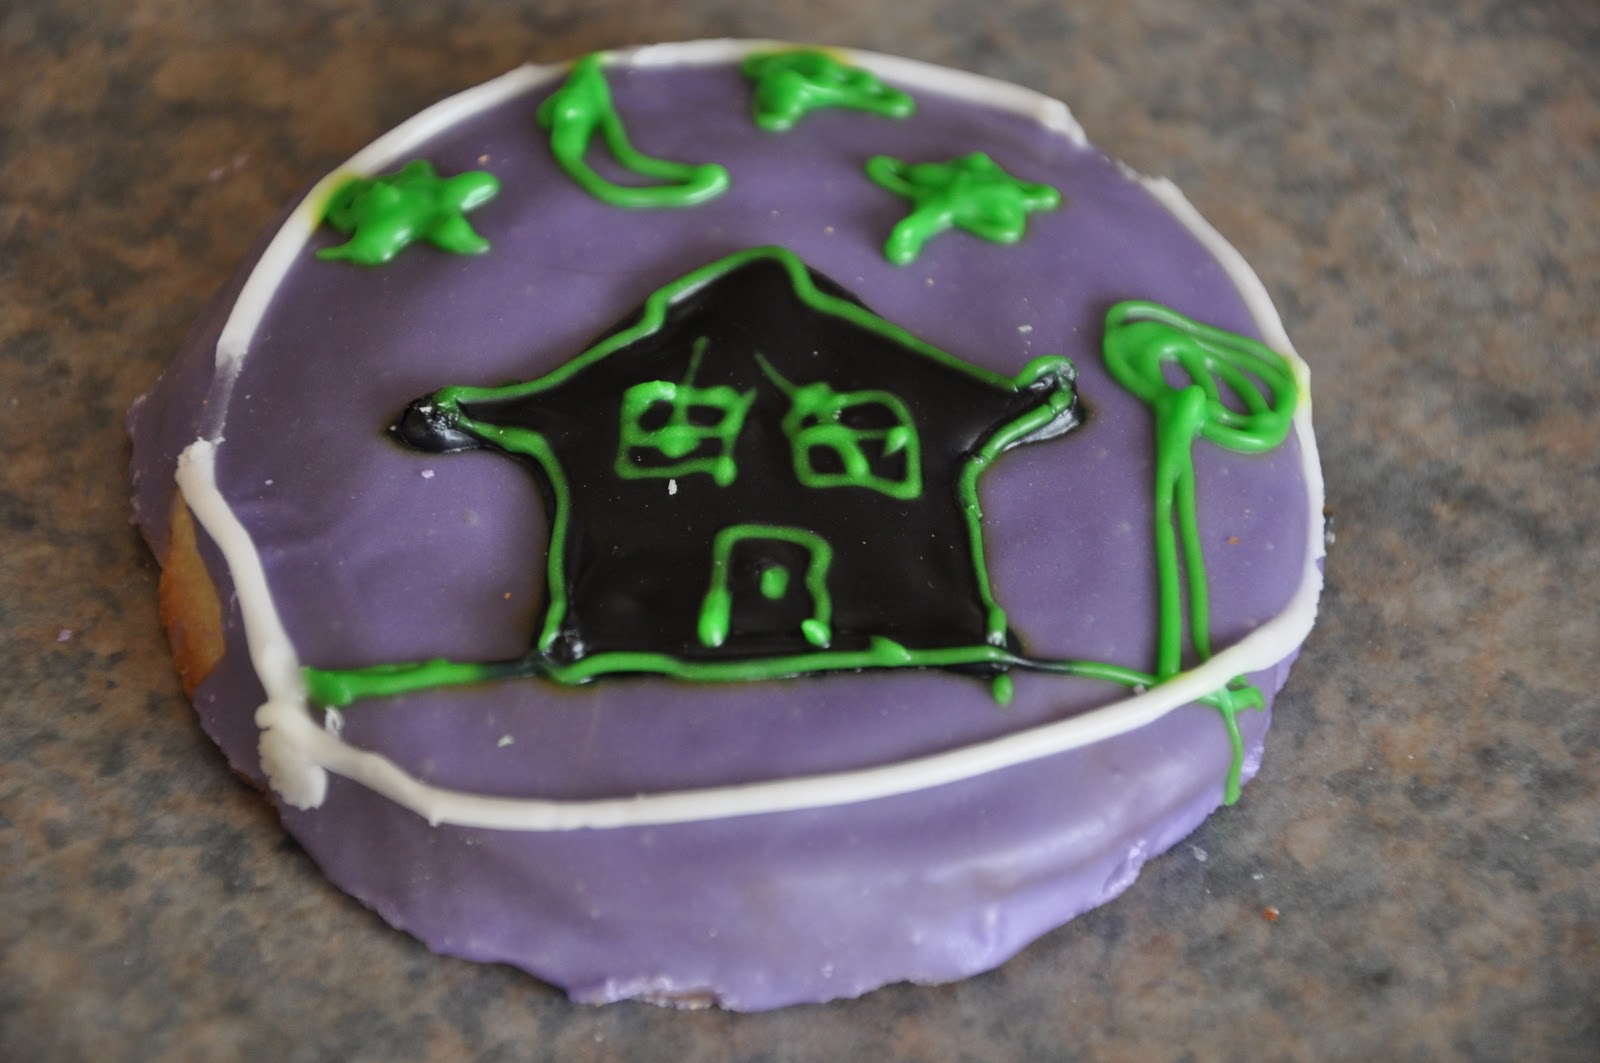
Decorating Spooky Halloween Cookies
This has been a tradition in my family for my whole life, but we always used buttercream. The last few years I have been experimenting with royal icing and have made some cute cookies, but when the family decorated theirs and went to take a bite, all they got was a goopy mess of royal icing that  hadn't set. I was sick of it of telling hungry guest they had to wait a few hours to eat their cookies so this year opted for a more party friendly glaze approach- and guess what- it worked just as well and tasted even better! Since taste is my number one priority I am using glaze for all my cookies now and never looking back! Here are my cookies with glaze decorations (I will have to find a way to make the edges look better, this time I just poured the glaze over the cookies on a wire rack). 


I even got my hubby to do one! Not too bad! :)
Here are my current favorite recipes:

Sugar cookie recipe:

Glaze Icing Recipe:

1 cup powdered sugar
1/4 tsp vanilla
1 TBS milk

Mix ingredients together by hand or with a mixer, adding more milk little by little, until you get a glue-like consistency. Pour over cookies on a wire rack or spread to the edge of cookie with a reverse spatula or back of spoon.

To make glaze to pipe decorations:
Add more powdered sugar to the icing until very thick- it will be hard to stir your spoon. Color icing and pipe with piping bags and piping tips #0, 1, 2 or 3.

Any Baked Goods with Pumpkin
MMMmmmm, I love pumpkin desserts this time of year- breads, cookies, cakes. One of my favorite combos is pumpkin cake with maple cream cheese buttercream. This year I wanted to make the cupcakes look a little more festive and did a jack-o-lantern face on them with chocolate chips- turned out so cute! And the texture and taste from the chocolate chips was awesome! I piped the frosting with a bigger round tip to give a little texture too.


I LOVE the pumpkin cupcake recipe from Ina Garten- so YUMMY!

Pumpkin Cupcakes with Maple Frosting from Ina Garten
Makes 10 cupcakes
1 cup all-purpose flour
1 teaspoon baking powder
1/2 teaspoon baking soda
1/2 teaspoon kosher salt
1 teaspoon ground cinnamon
1/2 teaspoon ground ginger
1/2 teaspoon ground nutmeg
2 extra-large eggs, at room temperature
1 cup canned pumpkin purée (8 ounces), not pie filling
1/2 cup granulated sugar
1/2 cup light brown sugar, lightly packed
1/2 cup vegetable oil

1. Preheat the oven to 350 degrees. Brush or spray the top of 10 muffin tins with vegetable oil and line them with 10 paper liners.
2. Into a medium bowl, sift together the flour, baking powder, baking soda, salt, cinnamon, ginger, and nutmeg. In a larger bowl, whisk together the eggs, pumpkin purée, granulated sugar, brown sugar, and vegetable oil. Add the flour mixture and stir until combined.
3. Divide the batter among the prepared tins (I use a level 2 1/4-inch ice cream scoop) and bake for 20 to 25 minutes, until a toothpick inserted in the center comes out clean. Set aside to cool completely.

I also only baked mine for 16 minutes- they were so moist and perfect!

 I did my own favorite cream cheese frosting recipe which is:
1 8oz cube of cream cheese
1 stick of butter
2 tsp vanilla
6 cups powdered sugar 
And then I added about 1/2 TBS of maple syrup to get a mild maple flavor

Mix softened cream cheese and butter
Add vanilla and maple syrup
Slowly add powdered sugar

Costumes 
I love dressing up for Halloween- some years I was the only adult who was dressing up for Halloween, but I still did it because it is so much fun! Now that I have kids to dress up it is even better!

This year we dressed up as Goldilocks and the Three Bears:


The Smell of Burning Pumpkin
When I was a kid, almost every home on my street had carved pumpkins with lit candles inside. So now the fun of trick or treating is forever infused with the smell of burning pumpkin, and I just love it!. I love the sight of the jack-o-lanterns all lit up too! How fun!


Tuesday, October 25, 2011

Falling for Fall

I love Fall and all the carnivals and festivities! We are enjoying every moment of Fall so far!

Our day at Hee Haw Farms!


There's little Annalise on the train- she loved it!


Dried corn in a "sandbox." Good Ol' Fashioned Fun!

We picked our own pumpkins right off the vine!

A hayride to the pumpkin patch! So much fun!
Our day at Cornbelly's Fall Carnival!


Jonah driving a tractor!
Duck races- go pink duck!
Princess Pumpkin Party- Annalise got to dress up like a princess and dance to princess songs on a stage!

We loved every minute!

Delightful Quote of the Day

Annalise was doing a puzzle and one of the animals in the puzzle was a newt.

Me: When I was a little girl I had a pet newt named Jazzy, but he ran away one night to go live in the backyard.

Annalise: Ohhhhh...so you ate your newt?

Me: NO! I wouldn't eat a newt, he just ran away.

Annalise: You WOULD eat a newt, you Little Stinker! You would eat a newt with your juice.

My Monthly Meal Planner/ Meal Calendar


I LOVE to cook and knew I needed a meal planner/calendar to make it more organized. I tried some other planner ideas about 2 years ago and found I needed something with more flexibility and less thinking! So I hatched this idea- but never knew exactly how to execute it. Finally I found a blank magnetic calendar and magnets in a kit. With these parts that I needed, making this thing was a breeze!

The beauty of this meal planner/calendar is you never need to sit down and think what meals you make every week- you only have to do it once when you make the kit. All your meal ideas are right there in front of you every month- no thinking required!

Also- if you are suppose to make chicken that night and feel like if you have to eat chicken again you will just die, then just simply swap the meal magnet for another one. Easy and flexible!

Here is where I got the kit- http://ldsscrap.com/cart/index.php?main_page=product_info&cPath=3&products_id=778&zenid=874a3f9f176b88eda3a2d8168c009d4a

Here's how I did it:

  • I made a list of all the meals I make and printed it out so I had the list in front of me.
  • I then used Word to draw some circles and using the rulers, I made sure they measured 1 inch by 1 inch. I then typed the meal names in the circles. 
  • I loaded some scrapbook paper into my printer and printed them out. I even used different paper for each type of meal, so it would be even easier to plan the month! 
  • Then I cut the circles out using a 1 inch circle scrapbook die cutter punch. 
  • After they were all cut, I used Mod Podge to glue the paper to the wood circles and squares that came with kit. 
  • I then cut the magnet strips that came in the kit and stuck those to the back of each circle or square.
I love this meal planner! It even makes my grocery shopping easier, and cooking is so much more fun when you are organized.


Happy Planning and Cooking!